Hello, everyone.
This is Enta.
This time, I used the iPhone 17 Pro’s LiDAR to capture a point cloud and try my hand at drawing a cross-sectional diagram! So, I tried to do it as inexpensively as possible.
I'll share the method and the final result.
Lately, I’ve been hearing quite a few civil engineers on-site say, “I’d like to try point cloud processing, but I want to test it out as inexpensively as possible first.”
At our firm, too, we’ve been seeing more and more situations where we think, “We could really use a cross-section here,” whether it’s to assess the current conditions before preparing a quote or to create explanatory materials for clients, so I decided to just go ahead and give it a try lol.
But that's beside the point.
You don't need a dedicated 3D scanner. All you need is the iPhone 17 Pro you already have.
Items to Prepare (Cost: Virtually 0 Yen)
All you need is an iPhone 17 Pro. (That might be the most expensive part, lol.)
Next, I'll use a free software program called Scaniverse to scan the site.
It's an app like this.
It's pretty well-known in the point cloud community.
*Scaniverse is a free 3D scanning app for iOS provided by Niantic (search for “Scaniverse” on the App Store). It is officially stated that the app supports life-size scanning on devices equipped with LiDAR.
Hardware: one iPhone 17 Pro; software: Scaniverse (free) and CloudCompare (free, GPL license).
The actual cost is practically zero. If you already have a device and a PC, you can get it up and running without any additional costs.
*Although Apple’s official specifications for the iPhone 17 Pro state that it is “equipped with a LiDAR scanner,” it is not equivalent to high-precision surveying equipment used in civil engineering.
Please consider this intended solely for simple surveying purposes.
Director Jou did something similar yesterday, so please take a look at it.
Project Scope (Site Using a Combination of Dry Stone Masonry and Concrete Blocks)
And here’s our target this time: a combination of dry-stacked stone and concrete blocks.
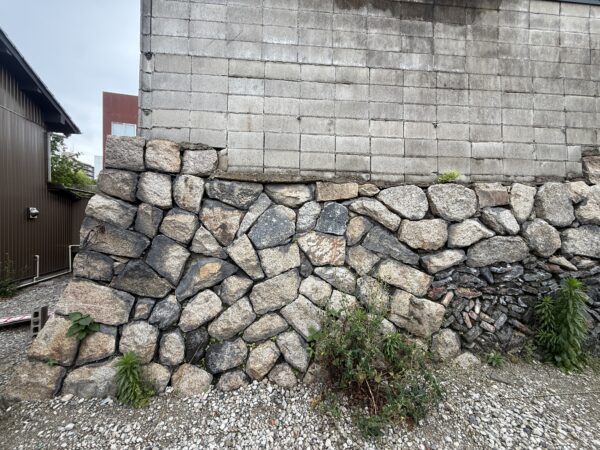
From my perspective, I can see a nice process of breaking down the past and rebuilding it.
With stone walls like this along the mountainside, there really aren't any blueprints left most of the time, lol.
I checked with the local government office, but there were no blueprints; the client also said, “My predecessor took care of it.”
In that case, I guess I’ll just have to start by getting a handle on the current situation.
In this post, I'll explain a quick, easy, and inexpensive way to create a cross-sectional view of this.
Importing Point Cloud Data into CloudCompare
This
CloudCompare(Website) I use a program called *[name]* on my PC.
*CloudCompare is open-source point cloud editing software. It is compatible with Windows, Mac, and Linux, and can be used for commercial purposes (within the scope of the GPL terms).
Please save the LiDAR data from the iPhone 17 Pro in LAS format and store it somewhere on your computer.
*If you select LAS (or .e57) in the Scaniverse export settings, you can import the file directly into CloudCompare.
Please make sure that the scale unit is set to "meters" when exporting.
If this is set to mm, the point cloud is displayed at a very small scale, and you'll end up thinking, "Nothing's showing up!" lol
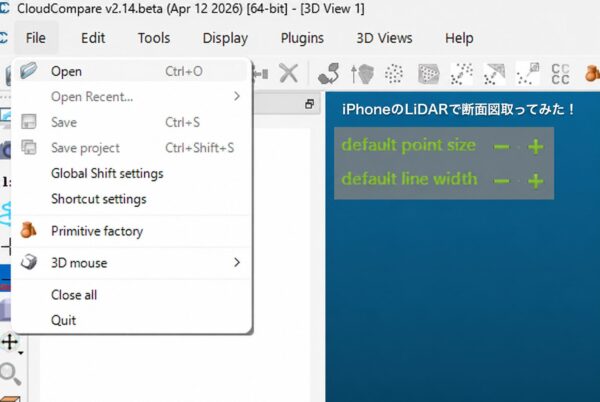
Install the software, open the software, and open the file.
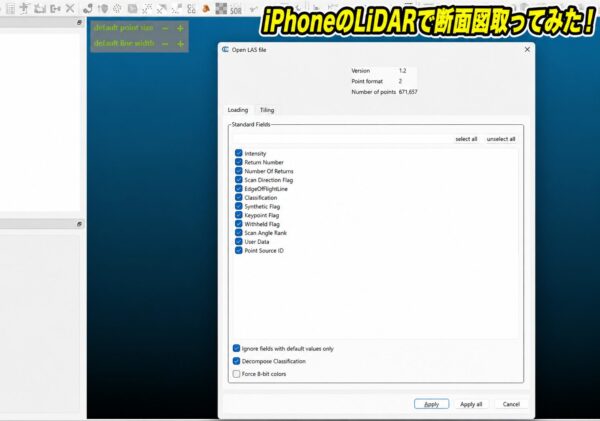
This will bring up a screen like this, so click the "Apply" button in the lower right corner!!?
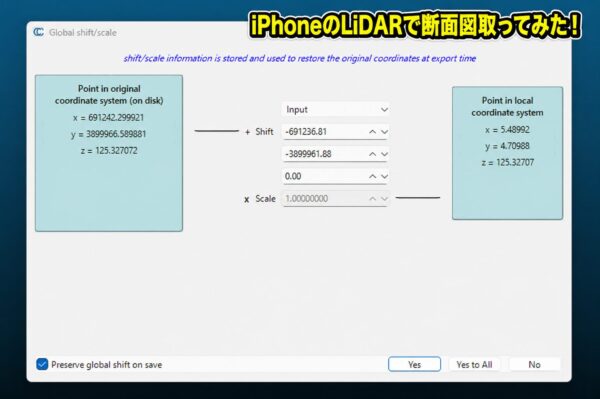
The coordinate values obtained by Scaniverse are displayed.
This is fine as is. (For now, anyway.)
So, what happens then!!?
The point cloud data will appear.
What do you think?
Is it coming out?
Here are just two common sticking points.
・If the points are too faint to see → Go to Display → Point Size in CloudCompare and set it to "2" or "3"—this will make them much easier to see right away.
・If nothing is displayed when exporting from LAS → Check the scale unit in Scaniverse's Export settings and change it to meters
I got totally hooked on this for about an hour back when I first started, lol.
Slicing Cross-Sections in CrossSection
From there, with the point cloud selected, choose Tools → Segmentation → CrossSection.
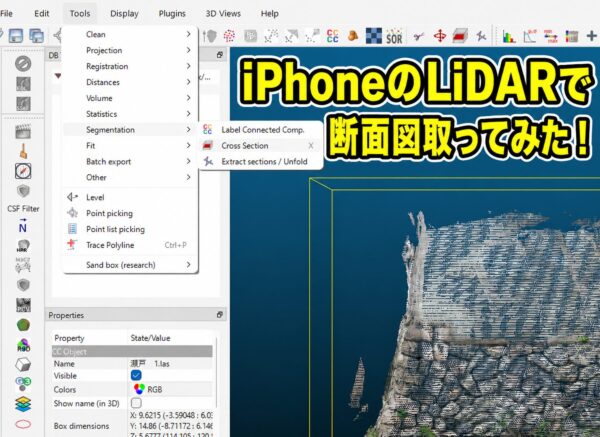
When you do that, the screen will look like this.
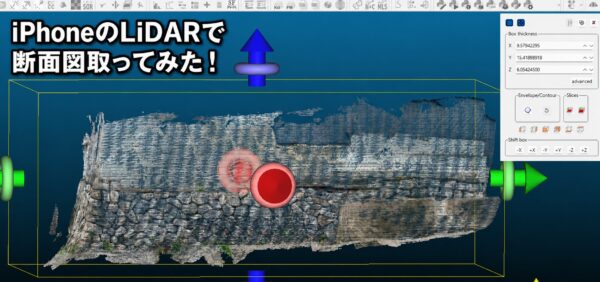
Here, tap the green arrow to adjust the width to 20 centimeters, aligning it with the section you want to cut.
In terms of coordinates, setting the Y value to 0.2 will make it narrower.
It depends on how the point cloud is captured and its quality, but since the iPhone LiDAR might produce a choppy result, a value of around 0.1 to 0.3 might be best.
This is more of a matter of feel, but from my personal perspective, when dealing with objects that have an uneven surface—like dry-stacked stone—it’s easier to connect the lines if you set the width a bit wider, around 0.2 to 0.3.
On the other hand, if the surface is flat—like a retaining wall—it cuts cleanly even at 0.1.
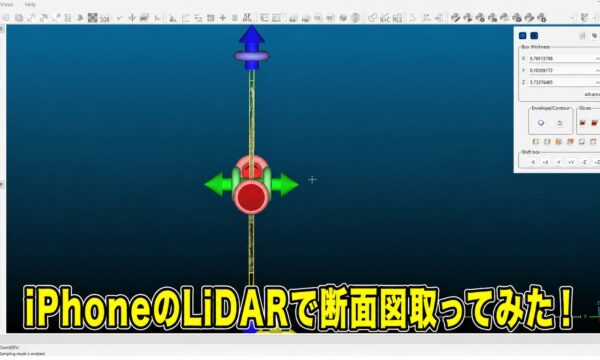
If you use this to rotate the image using the ring below the blue arrows (up and down) until it's sideways, you'll see the cross-section, right?
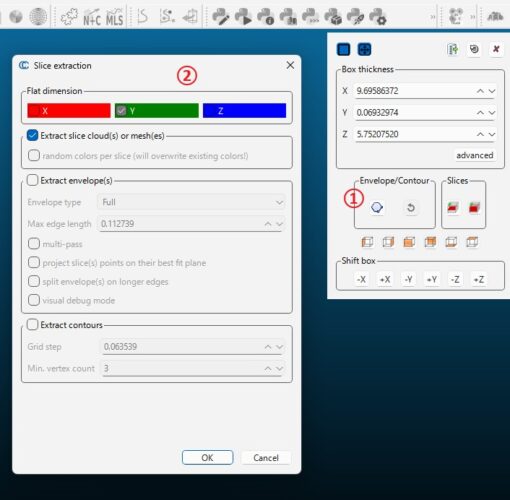
When you press ①, ② appears.
Since I want the Y cross-section this time, I'll check the "Y" box and click "OK."
A signal will appear indicating that it's done, so that's fine too.
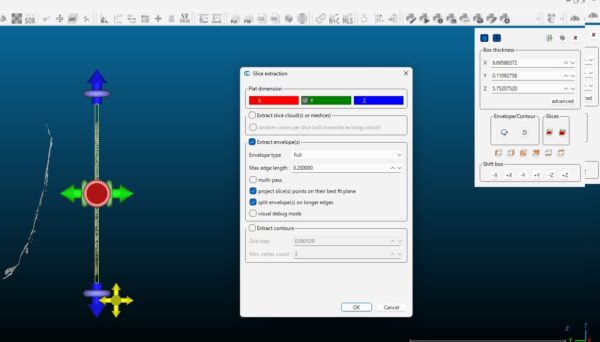
If things don't go as planned, please try the steps outlined above.
If you're having trouble getting a cross-section to appear, it's often because you've selected the X-axis instead of the Y-axis.
The orientation of the iPhone 17 Pro when you hold it to scan will affect the axis, so please try both the Y and X orientations the first few times.
A lot of people get hooked on this, lol.
Convert to polylines and export to DXF
If an entry named "filename.las.envelope" appears in the tree on the left, a polyline has been created.
This concludes the CrossSection course.
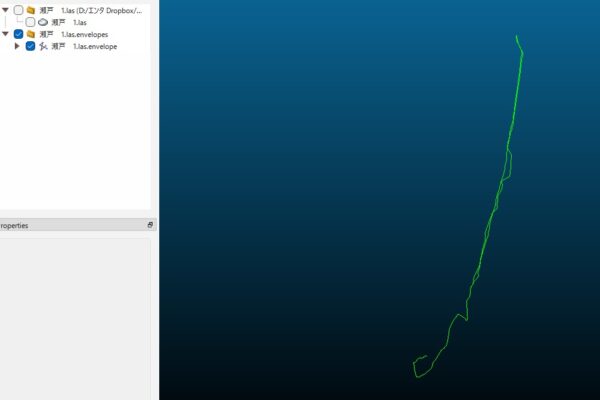
It looks something like this.
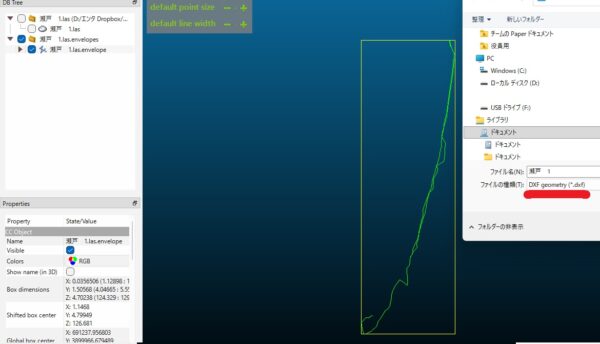
Also, if you save this as a DXF file, you'll be able to generate a cross-sectional view, so just open it in CAD and make the necessary adjustments.
Once you've exported the file as a DXF, you can open it in any CAD program you like, whether it's AutoCAD or Jw_cad.
However, the LiDAR on the iPhone 17 Pro is intended solely for basic measurements.
Since the accuracy isn’t high enough to be used directly in the construction drawings, if you ultimately take just two or three level survey points on-site and use those actual measurements to correct the point cloud, the resulting drawings will be usable for civil engineering purposes.
*I feel that there is still no industry-wide standard workflow for “the procedure for registering LiDAR point clouds in absolute coordinates.”
My impression as of May 2026 is that each company has its own way of doing things. This is just based on my personal experience, though lol.
Comparison with Dedicated Machines (Rough Estimate of Internal Costs)
Here's a rough comparison.
・Dedicated 3D laser scanner + operator: 500,000–1,000,000 yen per site
・Drone Photogrammetry + SfM Software: Starting at 100,000 yen per site
・iPhone 17 Pro + Scaniverse + CloudCompare: Actual cost is virtually 0 yen (assuming you already have a device and a PC)
Of course, dedicated 3D scanners are far superior in terms of accuracy. That goes without saying, lol.
However, for tasks such as assessing the current conditions before preparing an estimate, creating explanatory materials for the client, conducting internal reviews, and creating preliminary cross-sections, the LiDAR on the iPhone 17 Pro is more than capable of handling the job.
*Please note that the cost estimates above are based on our company’s actual experience. They will naturally vary depending on company size, region, and project, so please consider them as a general guideline.
I use this for "drawings needed during the design phase of private construction projects."
A preliminary cross-section provided as an initial report prior to switching to formal surveying.
"I need a cross-section for a meeting tomorrow, but I don't have the time or money to hire a surveyor!" In situations like that, the iPhone really comes in handy, lol.
If you're a civil engineer with an iPhone 17 Pro, I think it wouldn't hurt to keep this in mind lol
See you later.