Hello, everyone.
This is Enta.
Today marks the end of Golden Week!
Tomorrow is my first day back at work!
I'm not feeling quite as energetic as usual, so let's be extra careful at work tomorrow ^^

But that's beside the point.
Construction Sequence for On-Site Sprayed Concrete Formwork in Slope Construction (Part 1)
Construction Sequence for On-Site Sprayed Concrete Formwork in Slope Construction (Part 2)
Construction Sequence for On-Site Sprayed Concrete Formwork in Slope Stabilization Projects (Part 3)
Following up from the other day, we’re finally getting to the spray coating this time, lol.
Actually, there’s a step called “repairing the frame,” but I’ll skip that part, lol.
(Repair to stop mortar from seeping through the mesh)
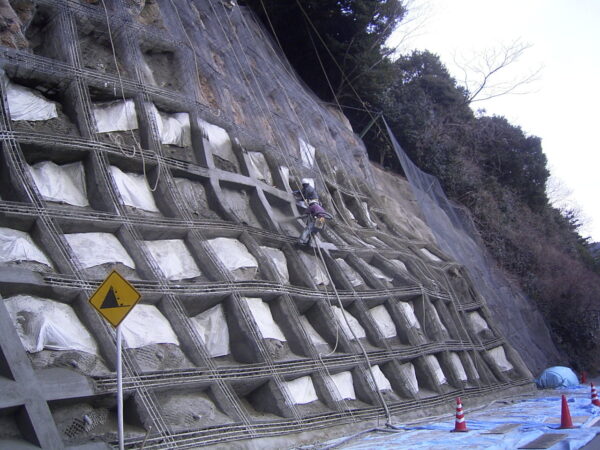
When applying spray coating, the general rule is to start from the base of the slope.
However, in practice, as long as you clean the area thoroughly before spraying, it’s fine even if you start from the top of the slope.
The advantage of spraying from the top is that the overspray falls downward, making it less likely to end up inside the formwork.
This "spray loss" occurs when mortar (cement, sand, and water) mixed at the plant is forced through a hose from the machine.
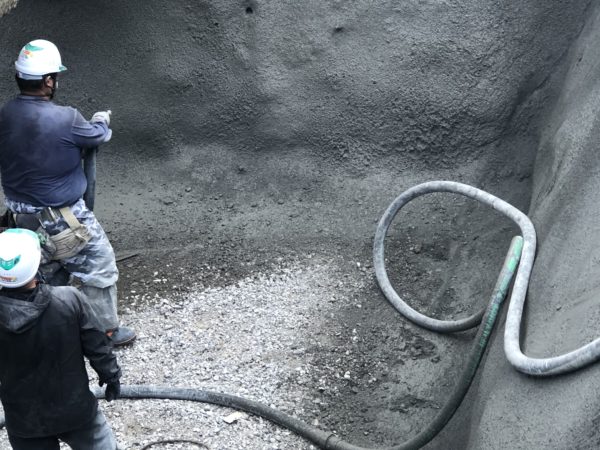
It is forced out through a hose like this, which is about 2 inches (φ48), using air pressure (about 0.7 MPa).
When that happens, they separate slightly.
It's still okay if there are just two hoses (40 meters), but the longer the distance, the greater the loss.
For distances of about 200 meters, it is possible to apply the material using a high-pressure compressor or similar equipment.
Depending on site conditions, spraying is possible over medium and long distances to a certain extent; for distances beyond that, a patented method used by major companies allows for spraying over 500 meters.
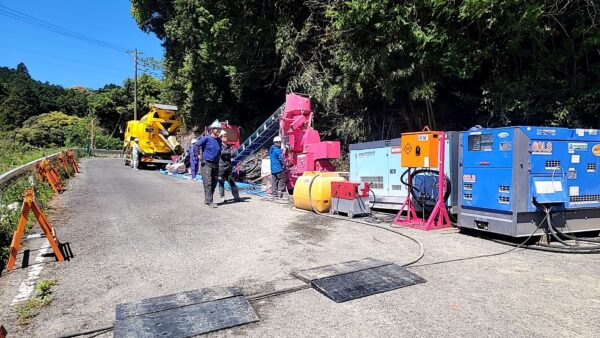
The spray plant described above is designed for use with ready-mix concrete trucks, but normally
There's a sand hopper next to the ready-mix concrete truck, and,
Sand Hopper ⇒ Belt Conveyor ⇒ Sand Weigher ⇒ Belt Conveyor ⇒ Spray Machine
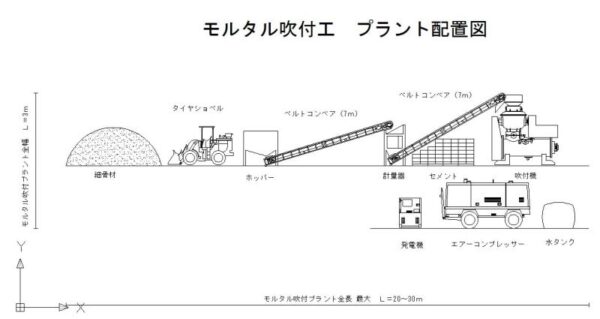
If you would like a CAD drawing, you can find it on our website under "Development" → "Downloads."
The standard compressor is 100 horsepower; according to Hokuetsu Kogyo's specifications, this corresponds to the PDS390S, a compressor with a capacity of just under 2 metric tons.
We use either a 45-kVA or 60-kVA generator.
If the quantity is small, as shown in the photo above, or if it is difficult to add cement or sand,
It is also common to purchase ready-mixed mortar or dry-mixed mortar from a ready-mix plant and use it for construction.
Ready-mix mortar has water added to it, but dry-mix mortar does not have water added, so
As shown in the photo, you need to measure out the ingredients and add water.
Since the plant is 20 to 30 meters long overall, it requires a yard of a certain size, but,
A set consisting of a squeeze pump and a ready-mix concrete truckInstallation of plants under 10 metersThat is also possible.
We use this method especially for construction on small lots. (I think this is particularly common in the Kanto region.)
Since this post on the plant got too long, I'll start with the formulation tomorrow.
It would be fine to just skim through this section, but since I want you to fully understand (and be aware of) this part, I’m going to explain it in detail.
I guess I'll start with the recipe tomorrow, huh? lol
See you later.