Hello, everyone.
This is Enta.
We've been getting a lot of requests for wells lately.
From shallow wells to deep wells.
Well, since we’ll be monitoring the well during the injection, it won’t make much of a difference, so we can go ahead and do it, but,
What I don't know is whether water actually comes out!
It's hard to say because we don't have any data on that.
If they're available in the area, they're usually in stock.
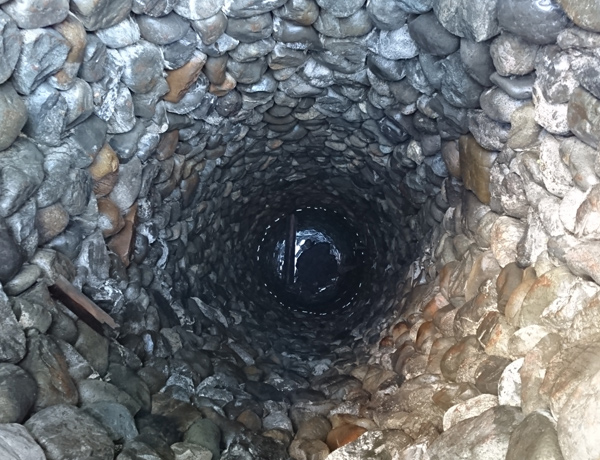
This is typically done manually, such as with hand-dug wells. Rotary drilling machines are also the most common method.
But since we’re an anchor company, we use a rotary percussion drill—it goes “baba-baba-baba”—and for holes about 10 meters long, we can finish drilling in just a few minutes.
Just insert the strainer tube there, and you're done.
When customers see that, they’re like, “Huh? Is it over already??”
We leave it up to you to decide whether to select and install the pump as an option.
But that's beside the point.
Installation of Ground Anchors
This is the first phase of the ground anchor installation project, and now that the scaffolding is in place, we’ll start by setting up the equipment.
When installing a drilling machine, it is important to:
1. Scaffold Position (Scaffold Height Directly Below the Drilling Location)
2. Drilling Location (Can the machine be set up there?)
3. Vertical Angle (Drilling Angle)
4. Horizontal direction (straight and perpendicular to the section under consideration)
That's how it works.

1. Scaffold Position (Scaffold Height Directly Below the Drilling Location)
This applies to the stage of erecting the scaffolding, and it’s extremely important. If you make a mistake here, in the worst-case scenario, you won’t be able to achieve the correct drilling angle.
If it's too low, you can raise it using scaffolding as a temporary fix. In the illustration above, that would be the area labeled "scaffolding position."
2. Drilling Location (Can the machine be set up there?)
Please be careful, as this part also depends on the scaffolding mentioned above.
In the diagram above, the slope'sRed CircleThis is the area where the hole will be drilled.
3. Vertical Angle (Drilling Angle)
This is a very important point, so please be sure to install it at the specified angle.
As for the design specifications, there is no issue when measuring the ±2.5-degree tolerance using a digital slant meter, but
When measuring with a slant rule, it’s easier to understand if you keep the tolerance within ±2.0.
Since it's analog, the 0.5-degree reading is a bit vague.
The reality is that many companies these days maintain a temperature of 2.0 degrees according to their internal standards.
Actually, since the machine is quite capable, it can generally be set to within ±1.5 degrees.
However, in soil consisting of a mixture of gravel and clay, the drilling position is highly prone to deviation (shifting).
While a skilled operator can compensate for this, an inexperienced operator may cause the angle to shift.
Well, that's all for now.
4. Horizontal direction (straight and perpendicular to the section under consideration)See you next time.
By the way, the image above is available for download on our company's website.
See you later.