Hello, everyone.
This is Enta.
Has the Obon holiday officially begun?
I guess the longest break is 10 consecutive days off, and the shortest is 2 consecutive days off, right?
I'm on leave from the company, so technically I'm on vacation, but since work has piled up just as expected, I'm working anyway lol
It looks like we're in for another round of heavy rain and stormy weather, so please be very careful and enjoy your Obon holiday.
But that's beside the point.
Since you mentioned in a previous post that there were some photos you didn't understand, I'll try to explain them.
Ignorance Is a Sin on a Construction Site
This article, right?
Here's what's odd about the photo in the "Zabuton" section of this article.
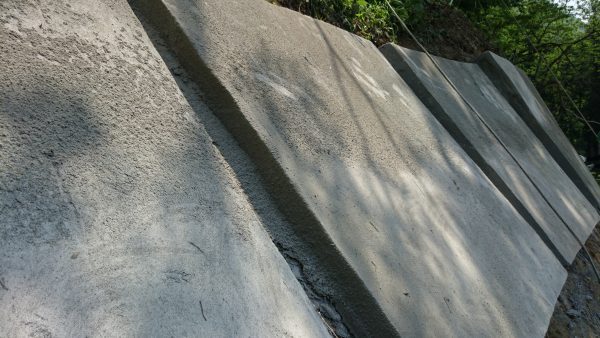
What's wrong with the zabuton frame in this photo?
In a previous article,
"Not only is the assembly wrong, but the installation is wrong too. The slope is off, and there are no voids."
I wrote that, but in this context,"No voids either." This isI withdraw that.
This space is unnecessary.
For zabuton frames, it’s best to apply the spray directly without installing voids and then drill holes, as this results in a cleaner finish.
We now recommend installation without voids.
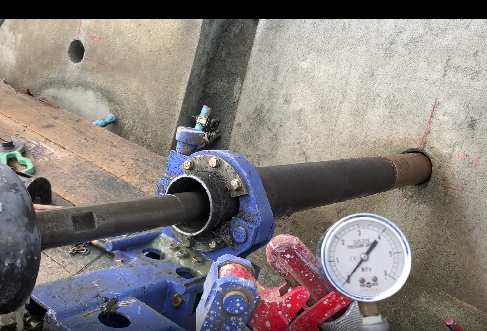
Not only is the assembly wrong, but the installation is wrong, too. The slope is wrong as well, and...
Regarding that.
Well, looking back now, as long as the parts are assembled in the correct shape, there’s really no problem.
Since the zabuton frame is really just a cushion to level out uneven surfaces, as long as it’s roughly shaped, I guess it doesn’t really matter how you put it together.
There are other parts of this photo of the zabuton frame that I’d like you to take a closer look at, but considering the contractor’s perspective and the supervisor’s instructions, I’ll proceed with the discussion as is for now.
The intended use of the zabuton frame is to adjust the angle (both horizontally and along the extension) when installing it at a certain angle relative to the drilling direction (study cross-section) in ground anchor construction, as well as to level out unevenness in the natural ground.
With that in mind, please take a look at the photo.
First of all, the angles are different in the foreground and background, right? lol
What's more, it's twisted.
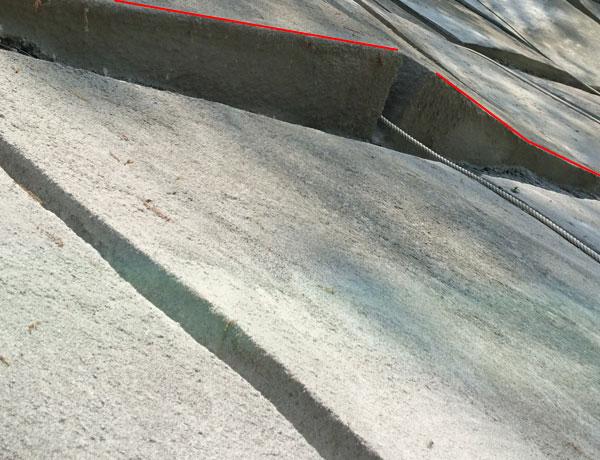
This site had a fixed angle, and the design called for driving the piles straight in the direction of the cross-section under consideration.
That is why it has been constructed straight across the natural ground like this.
It was perpendicular to the slope rather than to the cross-section under consideration.
If you look at the line at the bottom of the photo, you'll see that it curves slightly.
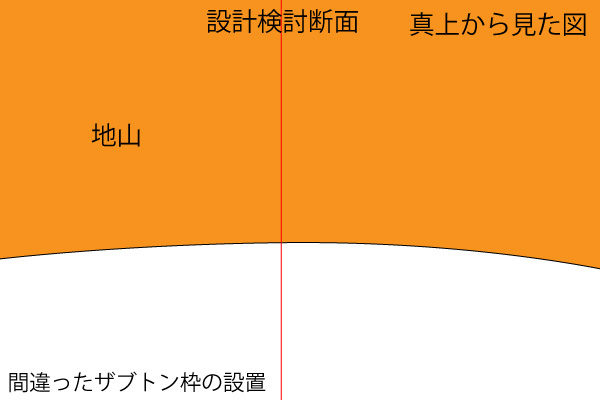
This is a sketch of the site before installation.
Install the zabuton frame here, just as shown in the on-site photos.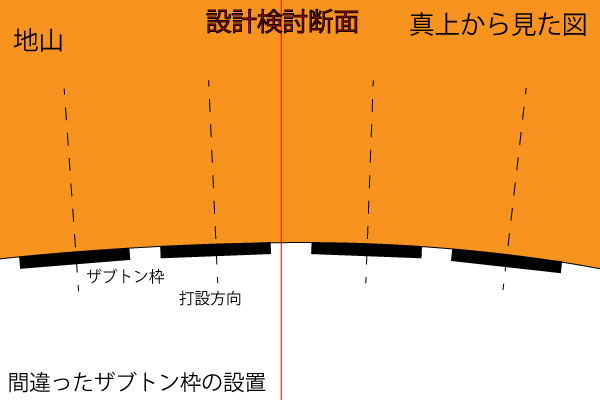
This is what the installation looks like on site.
However, the direction in which the anchors are installed is parallel to the cross-section under consideration.
Since it is already fan-shaped, if we adjust the pouring direction to match the cross-section, the accuracy of the head angle will be compromised when the pressure plate is installed.
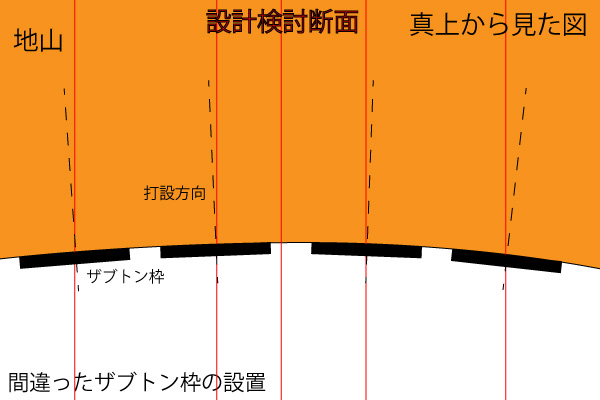
Normally, the shot would be directed toward the red mark, so there should be no difference (zero) between the actual position and the dashed line when the pressure plate is installed; however, due to the poor installation of the zabuton frame, it becomes difficult to adjust the angle.
Even with an angle-adjustable mount for the head, the angle was still too steep (at that site).
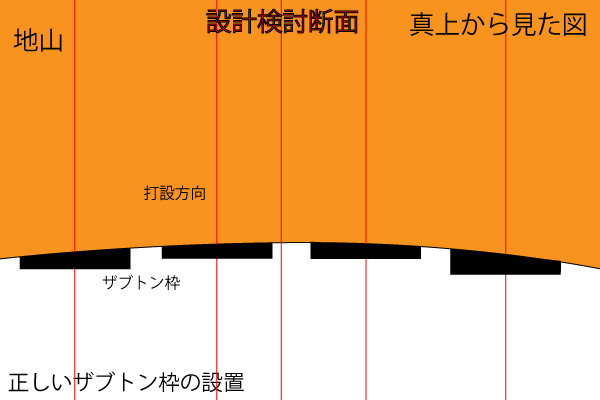
If you install it as shown above, you can proceed with the installation without worrying about any horizontal angle deviations.
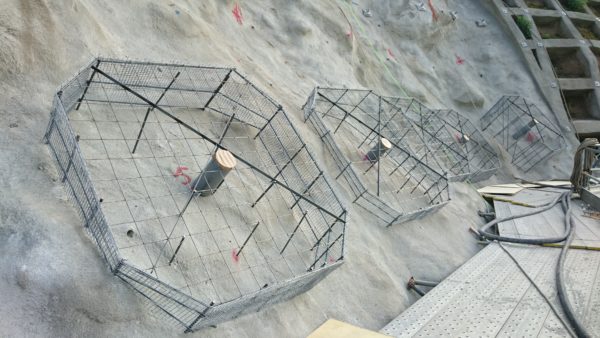
The assembly should have a similar feel to this.
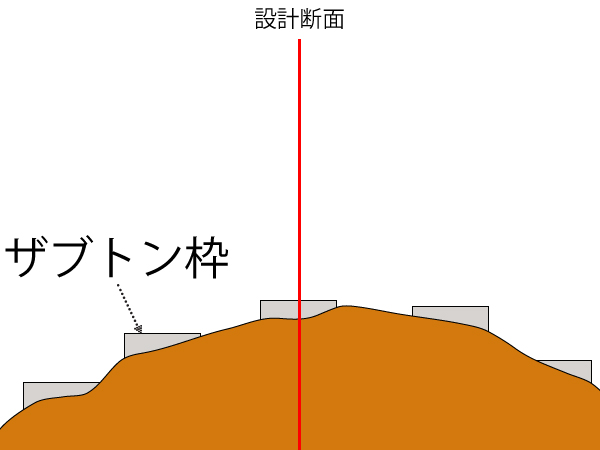
This is what it looks like when R is inflated.
Since the allowable tilt angle for the head alone when under tension is set at 5 degrees or less, I believe that if we install it so that the tilt is kept to around 3 degrees as much as possible, it should be fine in terms of both quality and appearance.
(This means that if the anchor installation angle is 30 degrees, even if there is a slight difference in angle when the compression plate is installed and the anchor is tensioned, it is not a problem as long as the difference is 5 degrees or less.)
Furthermore, because it is warped, when the load-bearing plate is installed, the load-bearing plate will either warp as well or become detached.
If it had been a PC pressure plate (made of PC concrete), it would definitely have cracked lol.
If you make the zabuton frame as flat as possible and try to keep the unevenness to 1 cm or less, the pressure plate should fit perfectly.
We will use a zabuton frame so that the angle can be adjusted using the angle-adjustable base.
The vertical position is adjusted using the angle adjustment base, and the horizontal position is adjusted using the zabuton frame.
Sometimes we combine the angles and shoot from both, lol—but it really depends on the situation on set.
See you later.