Hello, everyone.
This is Enta.
It wasn't much, but this week was pretty laid-back.
But! Things are going to really pick up again starting next week.
These are busy days. I’m truly grateful.
We’d like to thank both the Slope Team and the Anchor Team for keeping us so busy!
Thank you.
If things keep going like this until the end of the year... lol

But that's beside the point.
Sequence of Tensioning Operations for Temporary Anchors with Flange Extension
When tensioning a temporary anchor, where do you apply the pull?
You know those long temporary anchors lined up side by side?
At some job sites, the process involves driving two piles, installing a support structure, excavating, and then driving temporary anchors—and repeating this cycle.
I’m actually kind of happy to see that long anchor stretching out to the side, but,Dealing with nervousness takes a little know-howThat's it.
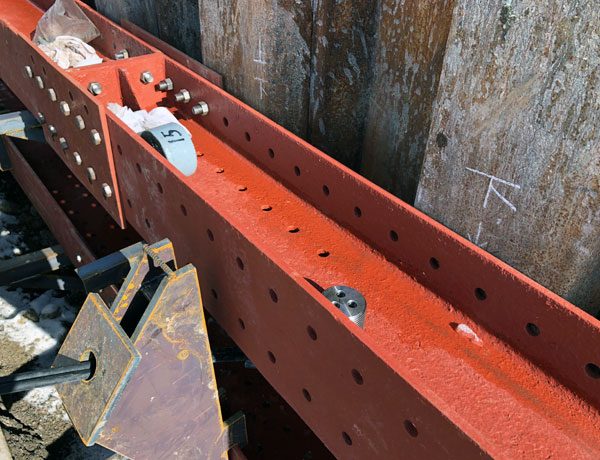
After drilling the holes, we will weld the brackets in place, lay the flanged H-beams on top, and install the steel base.
After that, you place the compression plate on top and apply tension—do you have a specific order in mind for the tensioning process?
*This is a top-down view.
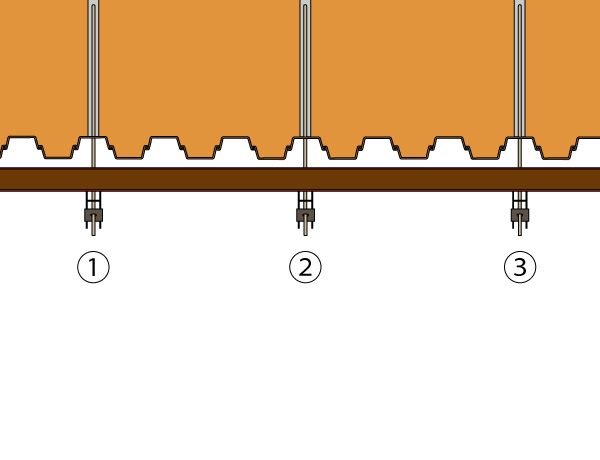
Let's assume we tension these three temporary anchors.
Which one should we start with??
This is a picture of me looking nervous right from the start.
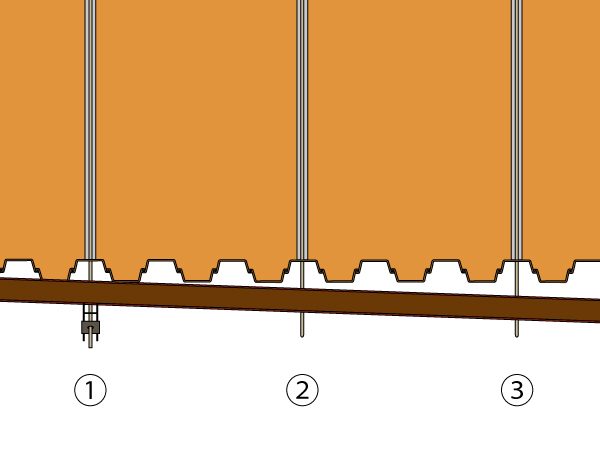
My belly button is tilted to the side.That's right.
If you tense ② in this position, it will put an unusual strain on ①.
And when it comes to long, extended abdominal raises,In the worst-case scenarioThe belly support falls out of the bracket!
If someone happens to be nearby when you fall off your balance... it's terrifying!
Eventually, it will bond well with the sheet piles, but to ensure that no uneven loads are applied,
Tension from the center is desirableThat's it.
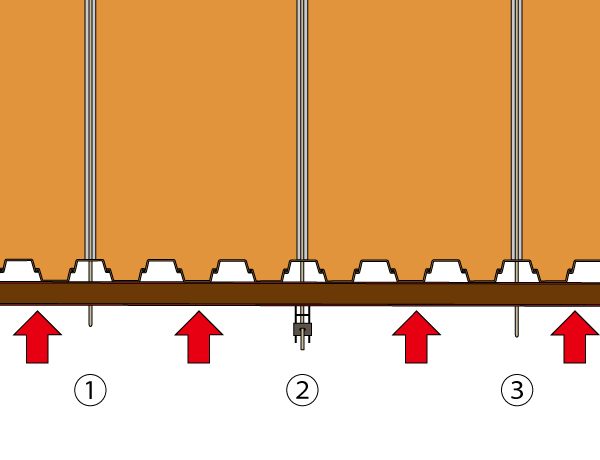
If you tense up starting from number 2, the entire belly will press against the sheet pile.
After this, you can tense either the left or the right side.
If the movement is horizontal, try to keep the center as taut as possible, and then move to one side or the other to achieve the best tension.
Tighten the anchor that's roughly in the middle and move it to either the left or the right.
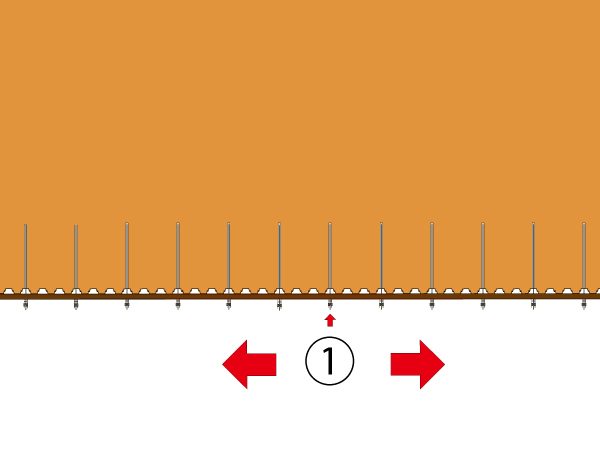
The diagram above illustrates that the center is the starting point, and the tension moves toward one side or the other.
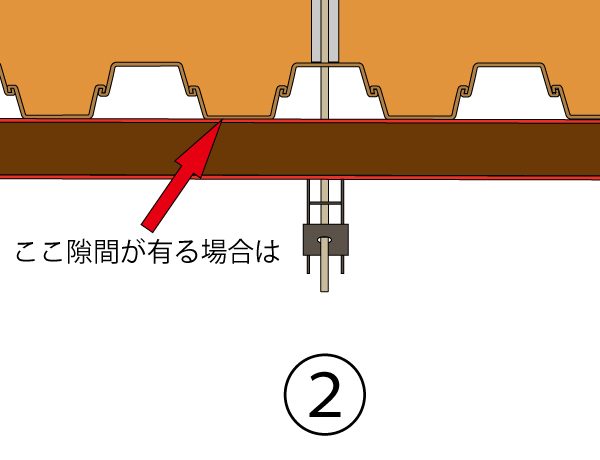
In areas where the sheet piles and the struts are not in contact, place ready-mix concrete in sandbags and wedge them between the piles, or drive in wooden wedges,
To ensure that tensile force is effectively transmitted to the sheet pilesPlease do that. (It's a construction worker's job, though, lol.)
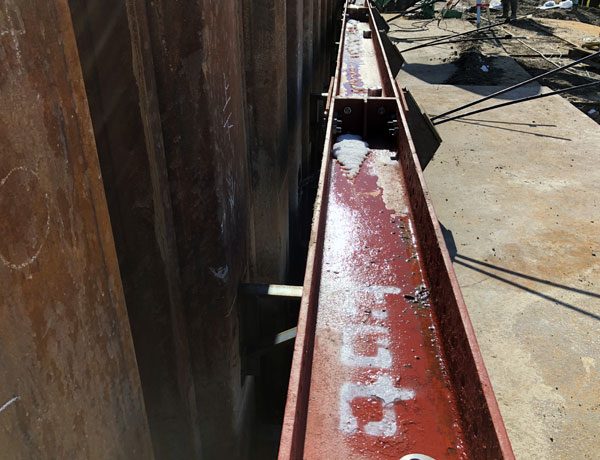
If you tense the center and then work your way toward one side, the gap in the abdominal lift shown in the photo above will gradually get smaller.
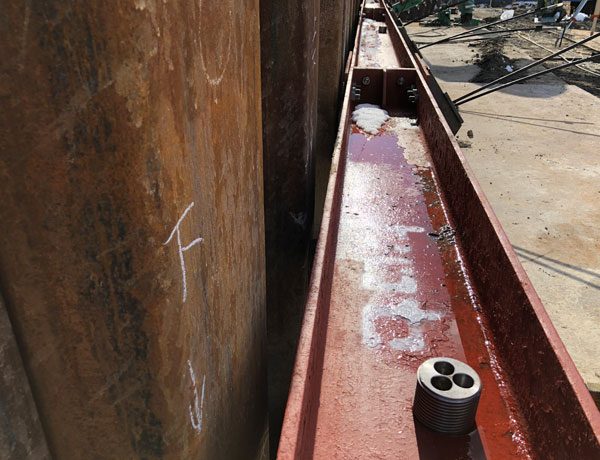
As the area of tension approaches, the gap gradually closes.
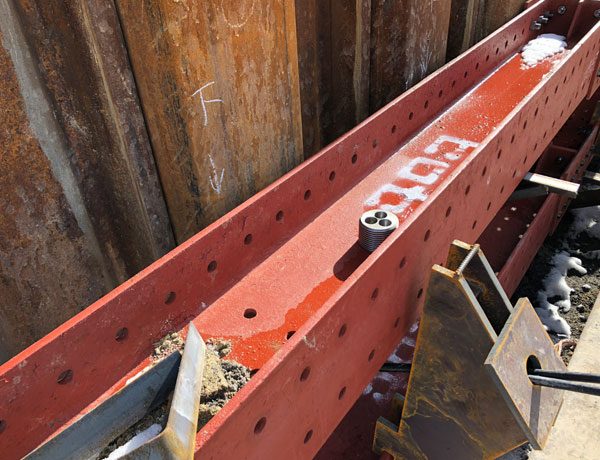
It blends in well, at least visually.
"Working to prevent accidents is the key to maximum construction speed" (lol)
See you later.
P.S. Akiruno City, Tokyo... I was surprised to learn that there are mountains in Tokyo!!